How to Draw a Easy Kawaii Bread
I live with Celiac disease which means that I can't really eat any bread but that is definitely not going to stop me from drawing it. Part of becoming an artist of any kind requires you to draw images that are simple and easy. They may seem unnecessary but in reality, they help to hone your skills. This is why we will be discussing how to draw a slice of bread today.
Rather than a flat design, in today's tutorial, we'll add some depth or 3D elements to our bread drawing to make it slightly more challenging and fun.
This will give you a beginner's look into 3D drawings in their simplest form. With time and practice, you can reach a level of realism that will blow your mind. But, for now, let's get into this quick and easy guide on how to draw a slice of bread.
At the end of this tutorial, I'll also share how to color in this slice of bread drawing that makes it look accurate and cute.
Steps For Drawing A Slice of Bread
Step 1

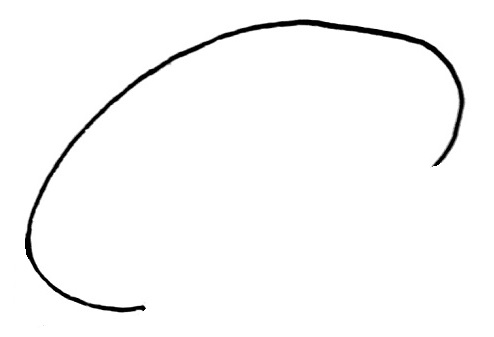
For the very first step of this tutorial, let's start with one end of the slice of bread. This is rounded and long. Think of an oval that is incomplete. Start from one corner and loop it all the way to the other until your line curves in.
Step 2

Now, let's create the center base for your slice of bread drawing. We'll add parallel lines that will connect to the ends of our incomplete oval drawing. Each line is approximately 6 – 8 cm in length. They should end at the same point because they will connect to each other later on.
Step 3

In this step, we'll add some details that make our slice of bread drawing appear to be 3D. Draw a very slight curved line about 2 cm out of your oval. Thereafter, follow the shape of the above line maintaining equal distance to create what looks like parallel lines.
Step 4

Continue this parallel line by drawing a straight line following the one above. Continue until the tip of your lower line can be connected to the upper line by simply adding a short vertical line.
Step 5

On the flip side of your drawing, from the point where your longest line ends, draw a straight and vertical line that looks almost identical to the one to your left.
Step 6

Lastly, add two parallel lines that connect either side to complete your slice of bread drawing. And that's it! You're done. You now possess the knowledge of how to draw a slice of bread in 6 easy steps.
I took this drawing one step further by coloring it in.
For the crust, I opted to use a darker brown compared to the cream which was used for the rest of my slice of bread.

Conclusion
Drawing a slice of bread may be simple but there are definitely some skills that can be developed by doing so. I found this to be a fun drawing and I hope that you did too.
With that being said, please feel free to head over to the comment section below and request a drawing you'd like for me to cover. I take requests and enjoy creating tutorials for my readers. And if you enjoyed this article on how to draw a slice of bread, please consider sharing it with someone who wants to learn how to draw.
Thank you for following this tutorial and please check out some of my other drawing guides that I have linked below.
How to draw a spoon
How to draw a starfish
How to draw mittens
How to draw a candy cane
Source: https://bujobabe.com/how-to-draw-a-slice-of-bread/
0 Response to "How to Draw a Easy Kawaii Bread"
Post a Comment